Back
Creating and Managing Check-In Lists
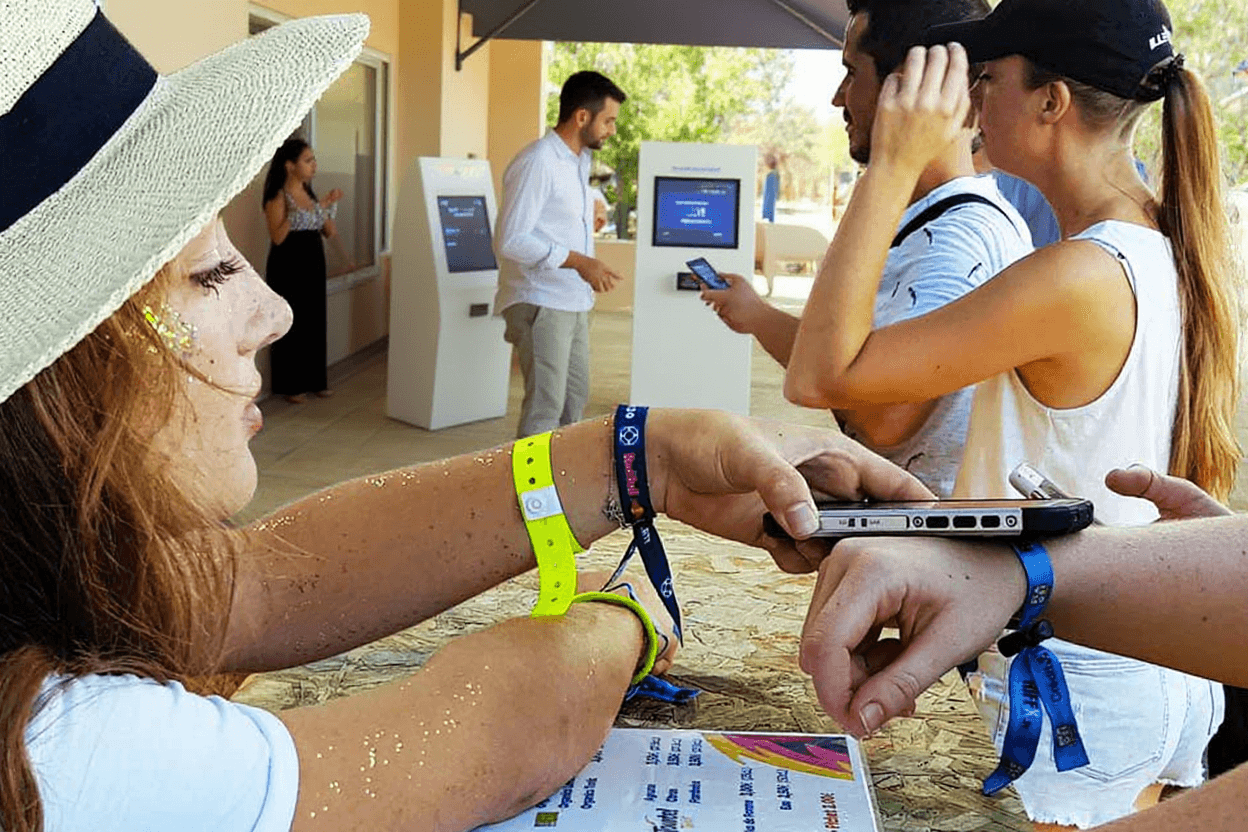
Check-in lists help you manage event entry smoothly and track attendance. You can create multiple lists for different purposes, such as VIP entrance, general admission, or specific session tracking.
Each check-in list can be accessed by multiple staff members simultaneously, making it perfect for events with multiple entry points.
Creating Your Check-In List
1. Start list creation
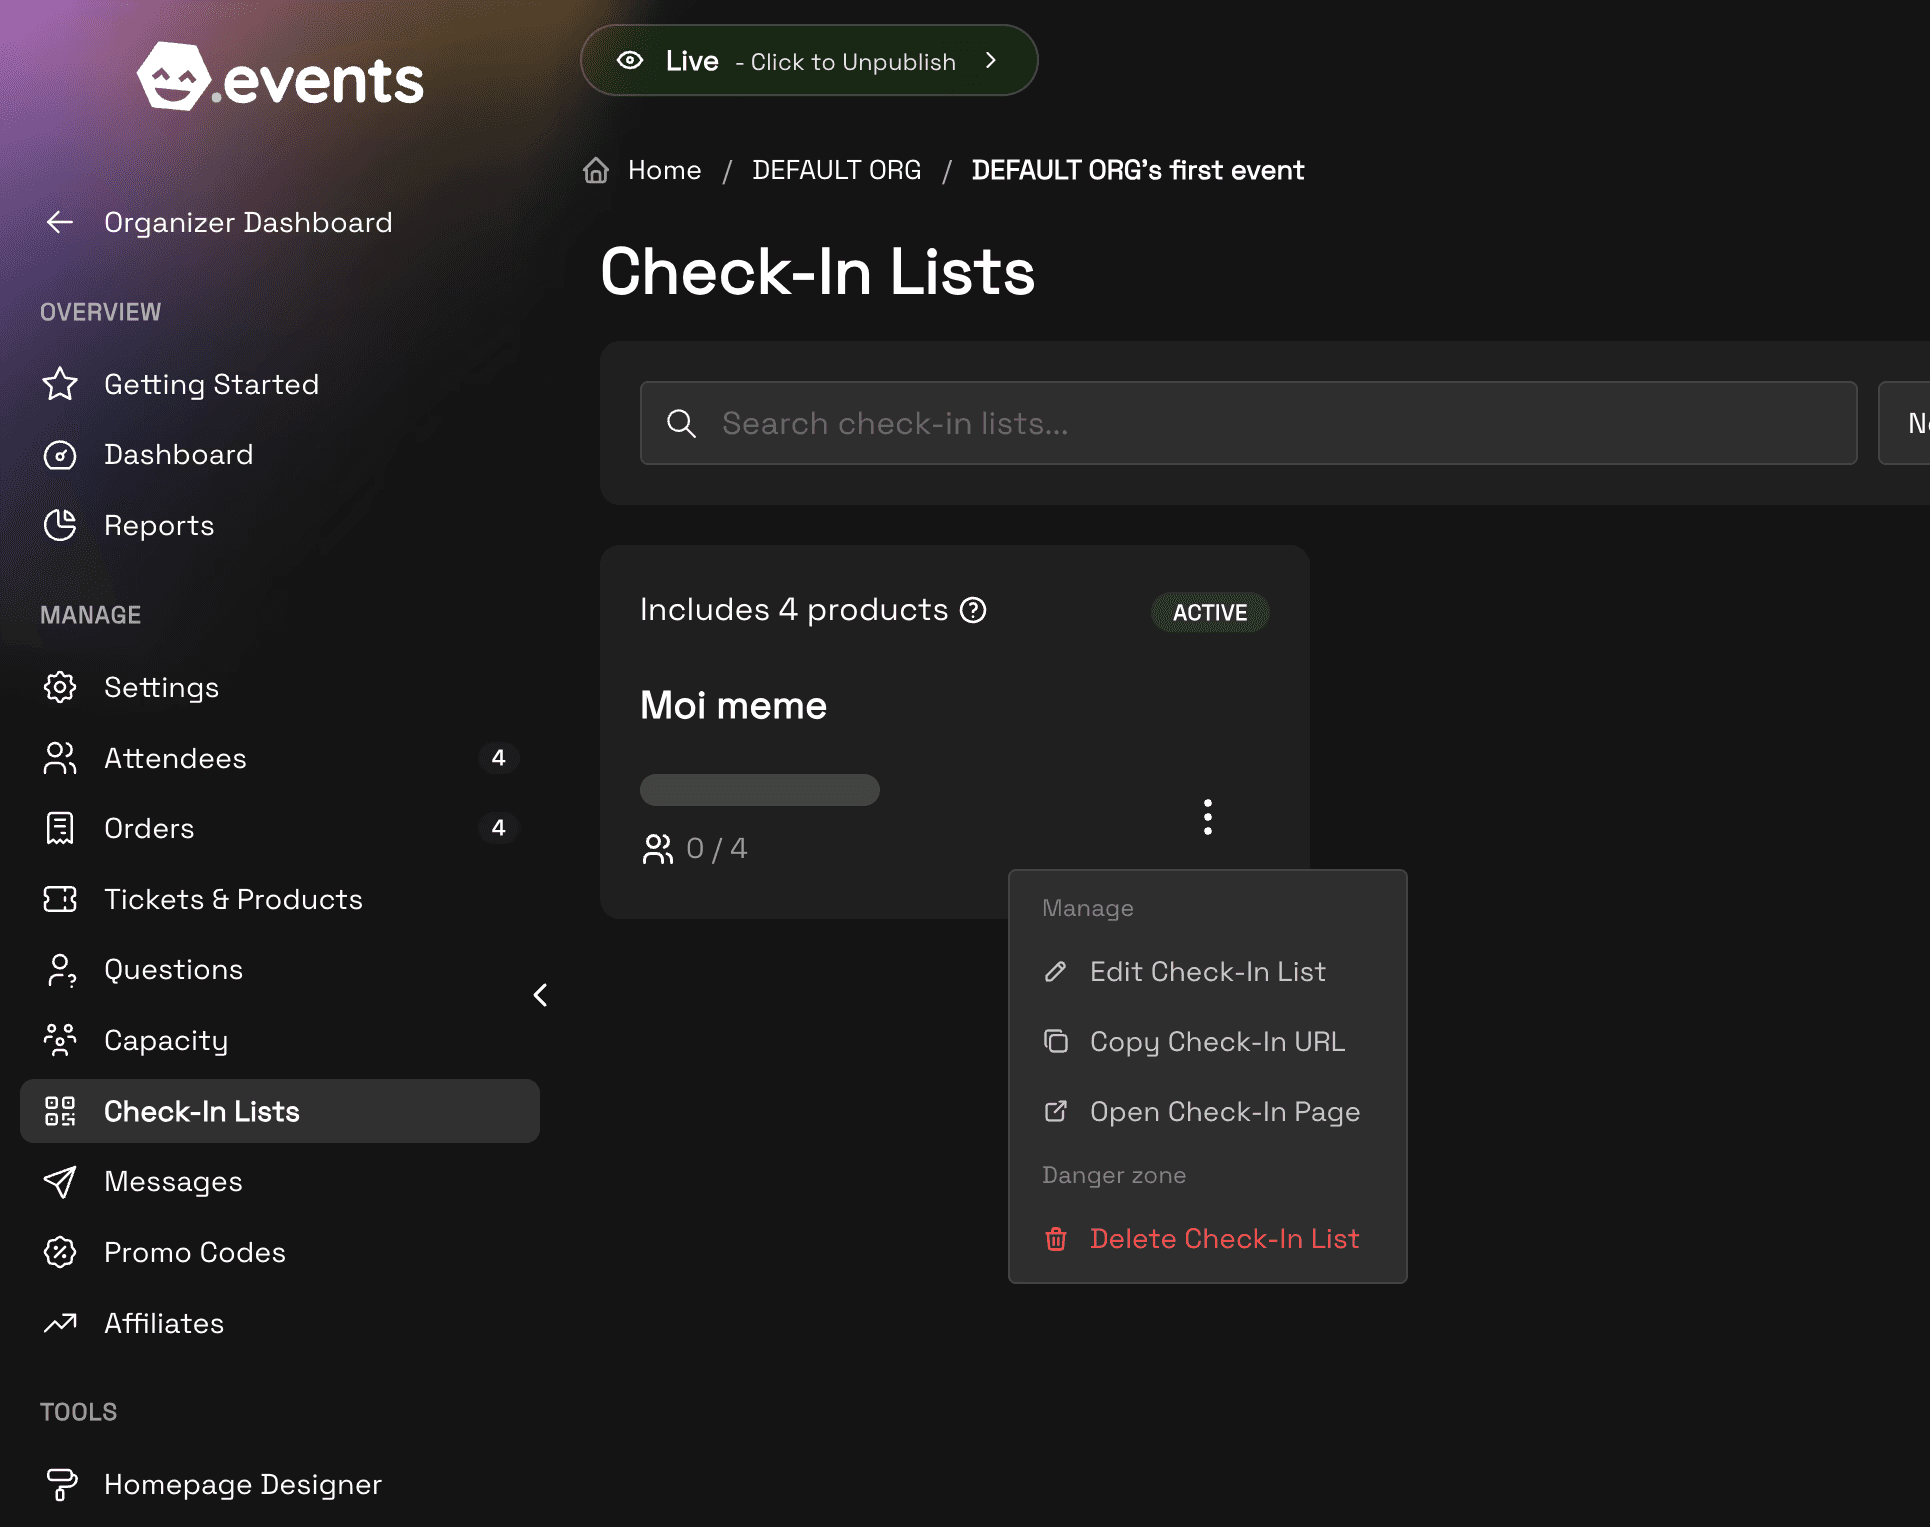
From your event dashboard, click "Create Check-In List" to begin.

Start by clicking Create Check-In List
2. Name your list
Give your list a descriptive name that helps staff identify its purpose.
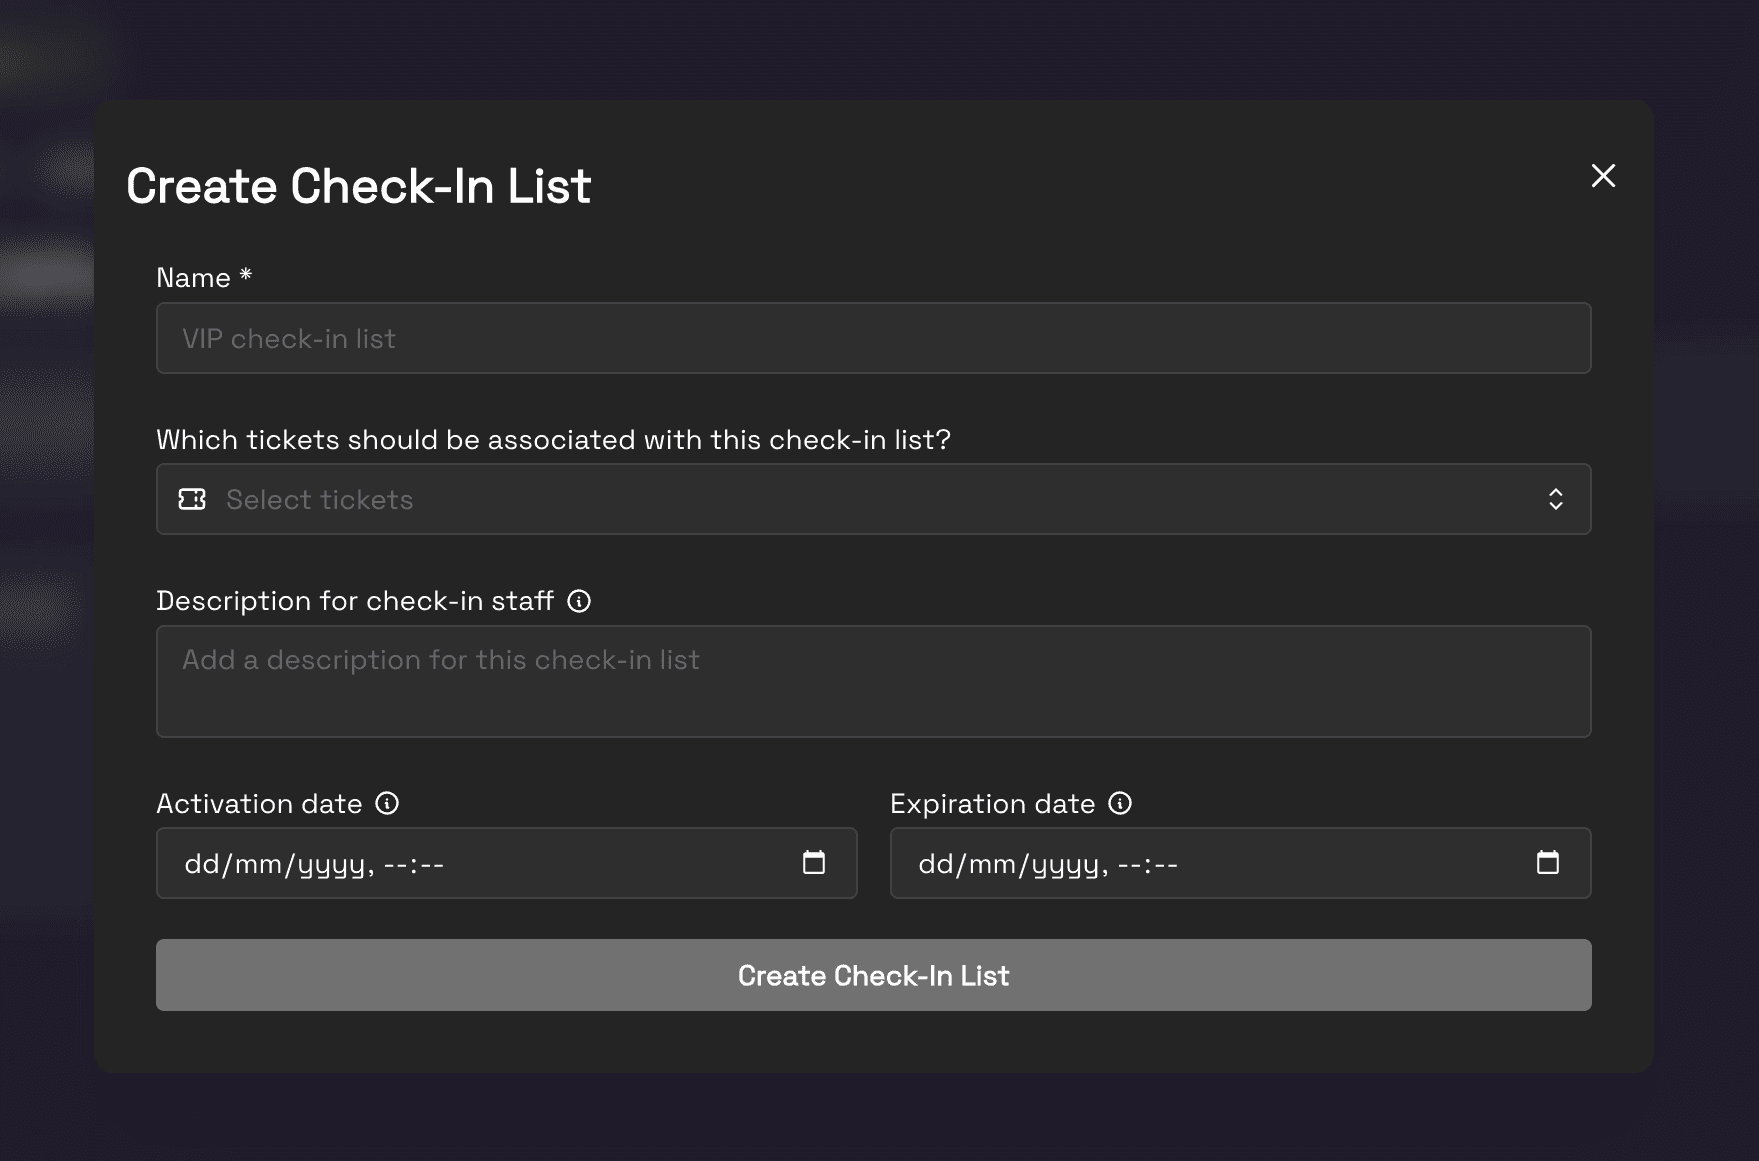
Enter a clear name like 'VIP Check-in List'
3. Associate ticket types
Select which ticket types can be checked in using this list. This helps prevent unauthorized access levels.

Choose which tickets can be processed with this list
4. Set time restrictions
Optionally set activation and expiration dates to automatically enable/disable the list.
Set optional time restrictions for list usage
5. Create the list
Click "Create Check-In List" to finalize your setup.
Finalize your check-in list creation
Using the Check-In List
6. Access the check-in interface
Open the check-in page from the dropdown menu to start processing attendees.
Access your check-in list through the dropdown menu
7. Check in attendees
Use the "Check In" button to mark attendees as arrived.
Click Check In to mark an attendee's arrival
8. Check out capability
If needed, you can check out attendees using the "Check Out" button.
Use Check Out for tracking departures or managing capacity
QR Code Scanning
9. Enable QR scanner
Click "Scan QR Code" to use the device's camera for quick check-ins.
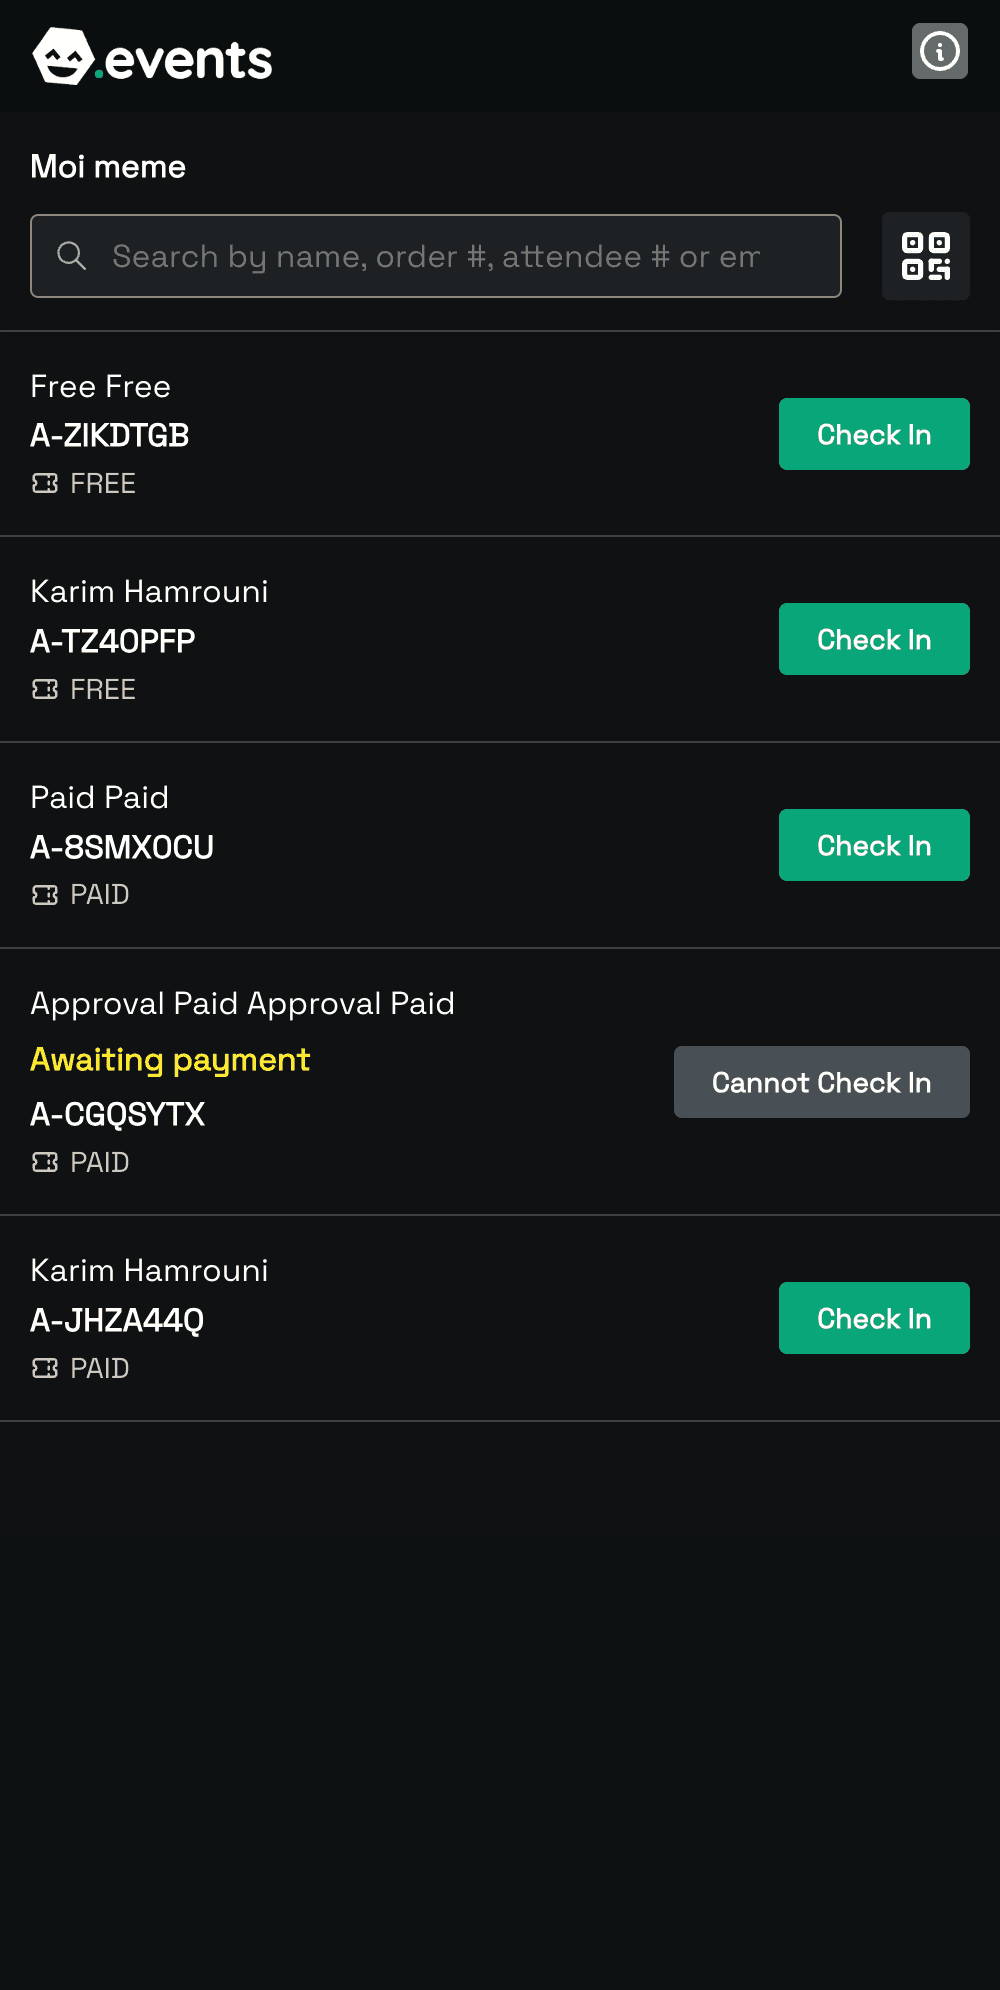
Access the QR scanner for faster check-ins
10. Use the flashlight
Toggle the flashlight for better scanning in low-light conditions.
Enable the flashlight using the lightbulb icon
11. Enable audio feedback
Turn on audio confirmation for successful and failed check-ins.
Enable audio feedback for scan confirmations
Check-In Best PracticesCreate separate lists for different entry points or ticket typesTest the QR scanner in advance with sample ticketsEnable audio feedback in noisy environmentsHave a backup plan for manual check-ins if neededTrain staff on using both QR and manual check-in methods
Next Steps
After setting up your check-in list:
Share the check-in page link with your event staff
Test the process with sample tickets
Consider creating backup lists for redundancy
Each check-in list can be accessed by multiple staff members simultaneously, making it perfect for events with multiple entry points.
Creating Your Check-In List
1. Start list creation
From your event dashboard, click "Create Check-In List" to begin.
Start by clicking Create Check-In List
2. Name your list
Give your list a descriptive name that helps staff identify its purpose.
Enter a clear name like 'VIP Check-in List'
3. Associate ticket types
Select which ticket types can be checked in using this list. This helps prevent unauthorized access levels.
Choose which tickets can be processed with this list
4. Set time restrictions
Optionally set activation and expiration dates to automatically enable/disable the list.
Set optional time restrictions for list usage
5. Create the list
Click "Create Check-In List" to finalize your setup.
Finalize your check-in list creation
Using the Check-In List
6. Access the check-in interface
Open the check-in page from the dropdown menu to start processing attendees.
Access your check-in list through the dropdown menu
7. Check in attendees
Use the "Check In" button to mark attendees as arrived.
Click Check In to mark an attendee's arrival
8. Check out capability
If needed, you can check out attendees using the "Check Out" button.
Use Check Out for tracking departures or managing capacity
QR Code Scanning
9. Enable QR scanner
Click "Scan QR Code" to use the device's camera for quick check-ins.
Access the QR scanner for faster check-ins
10. Use the flashlight
Toggle the flashlight for better scanning in low-light conditions.
Enable the flashlight using the lightbulb icon
11. Enable audio feedback
Turn on audio confirmation for successful and failed check-ins.
Enable audio feedback for scan confirmations
Check-In Best PracticesCreate separate lists for different entry points or ticket typesTest the QR scanner in advance with sample ticketsEnable audio feedback in noisy environmentsHave a backup plan for manual check-ins if neededTrain staff on using both QR and manual check-in methods
Next Steps
After setting up your check-in list:
Share the check-in page link with your event staff
Test the process with sample tickets
Consider creating backup lists for redundancy
Other articles you might like
Learn how to increase your productivity with calendars