Back
Creating Products and Ticket Tiers
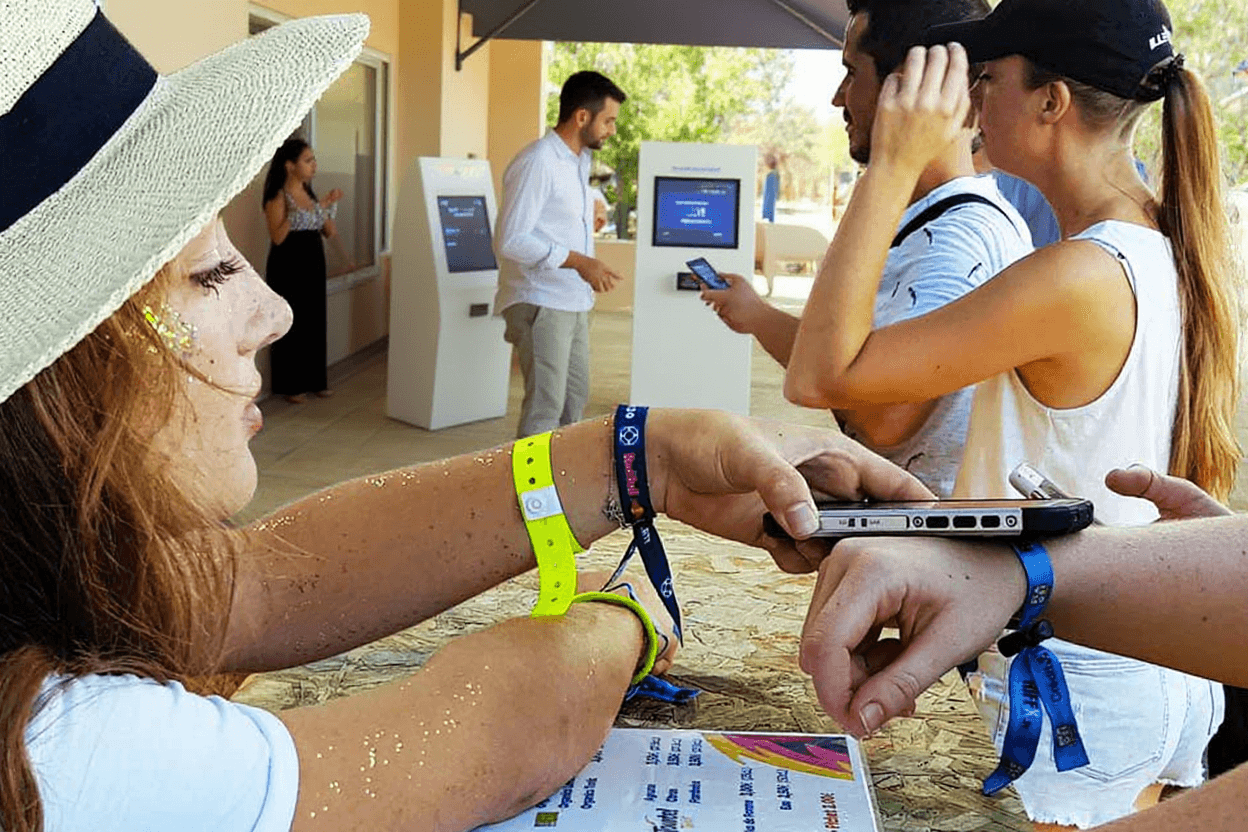
Bip.Events offers flexible product creation options, allowing you to sell both tickets and general merchandise. You can create tiered pricing structures, handle donations, and manage various purchase options for your event.
Getting Started
1. Begin product creation
Click "Add Product to Category" from your event products page.
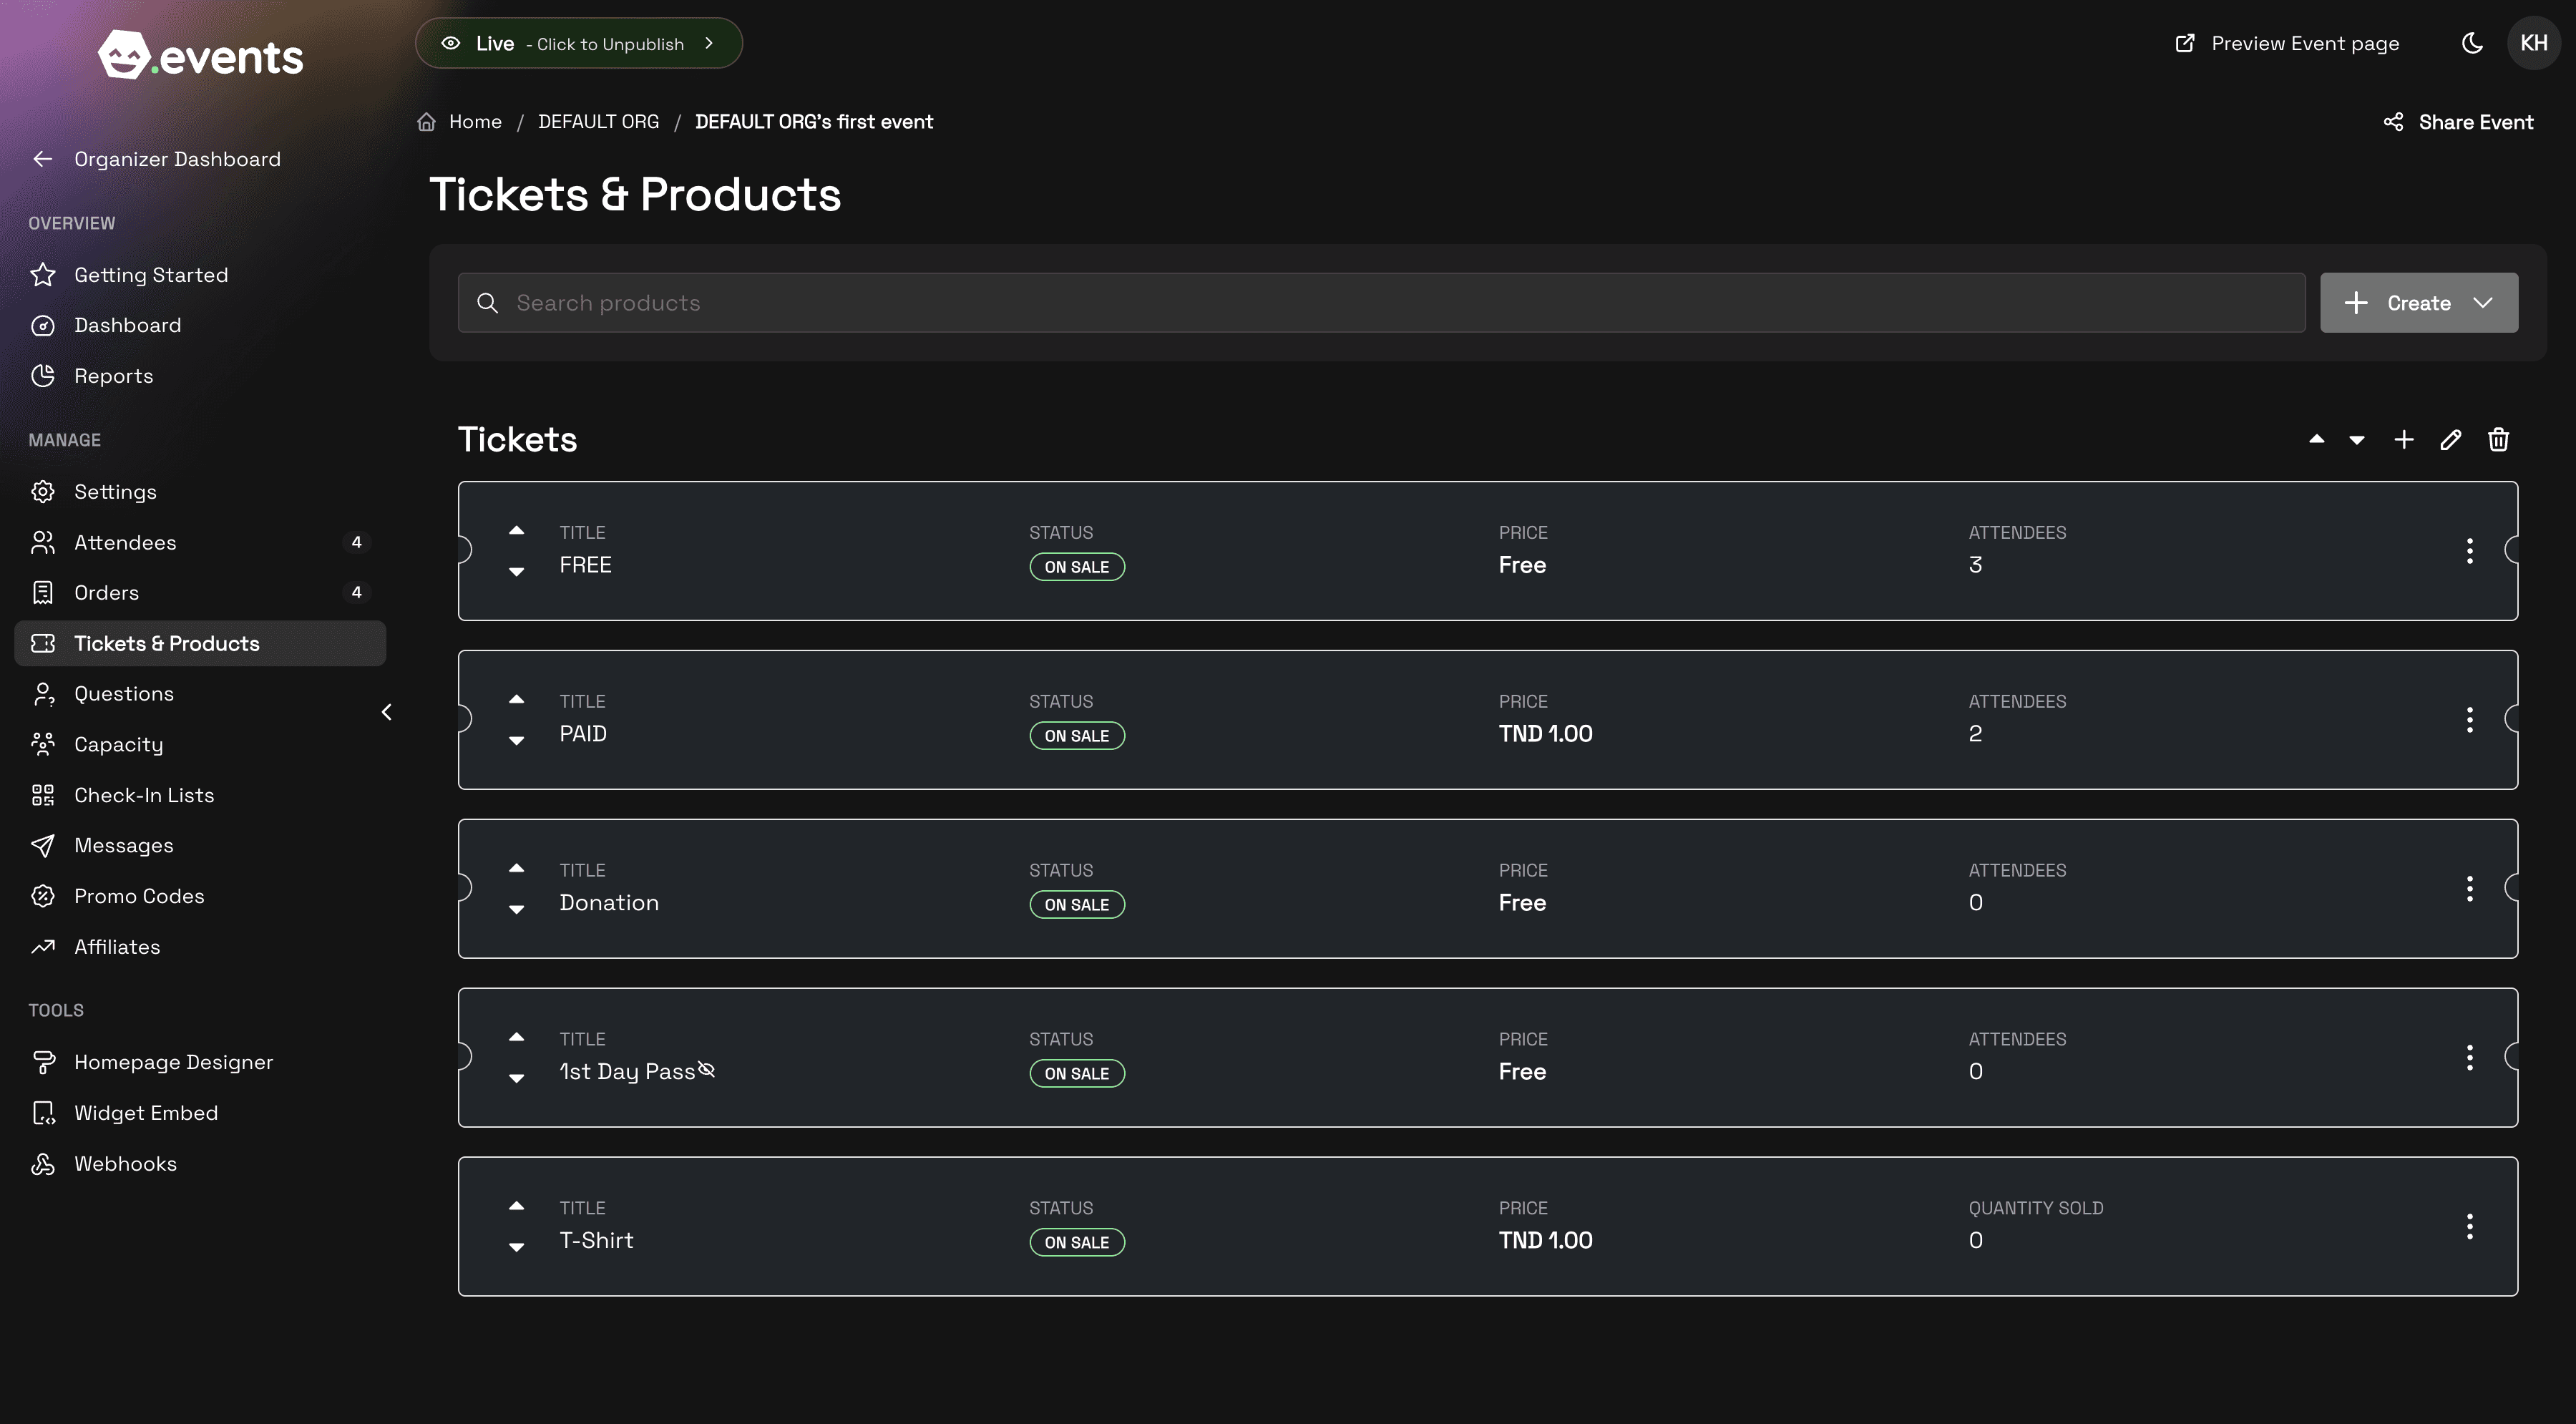
Start by clicking Add Product to Category
2. Choose product category
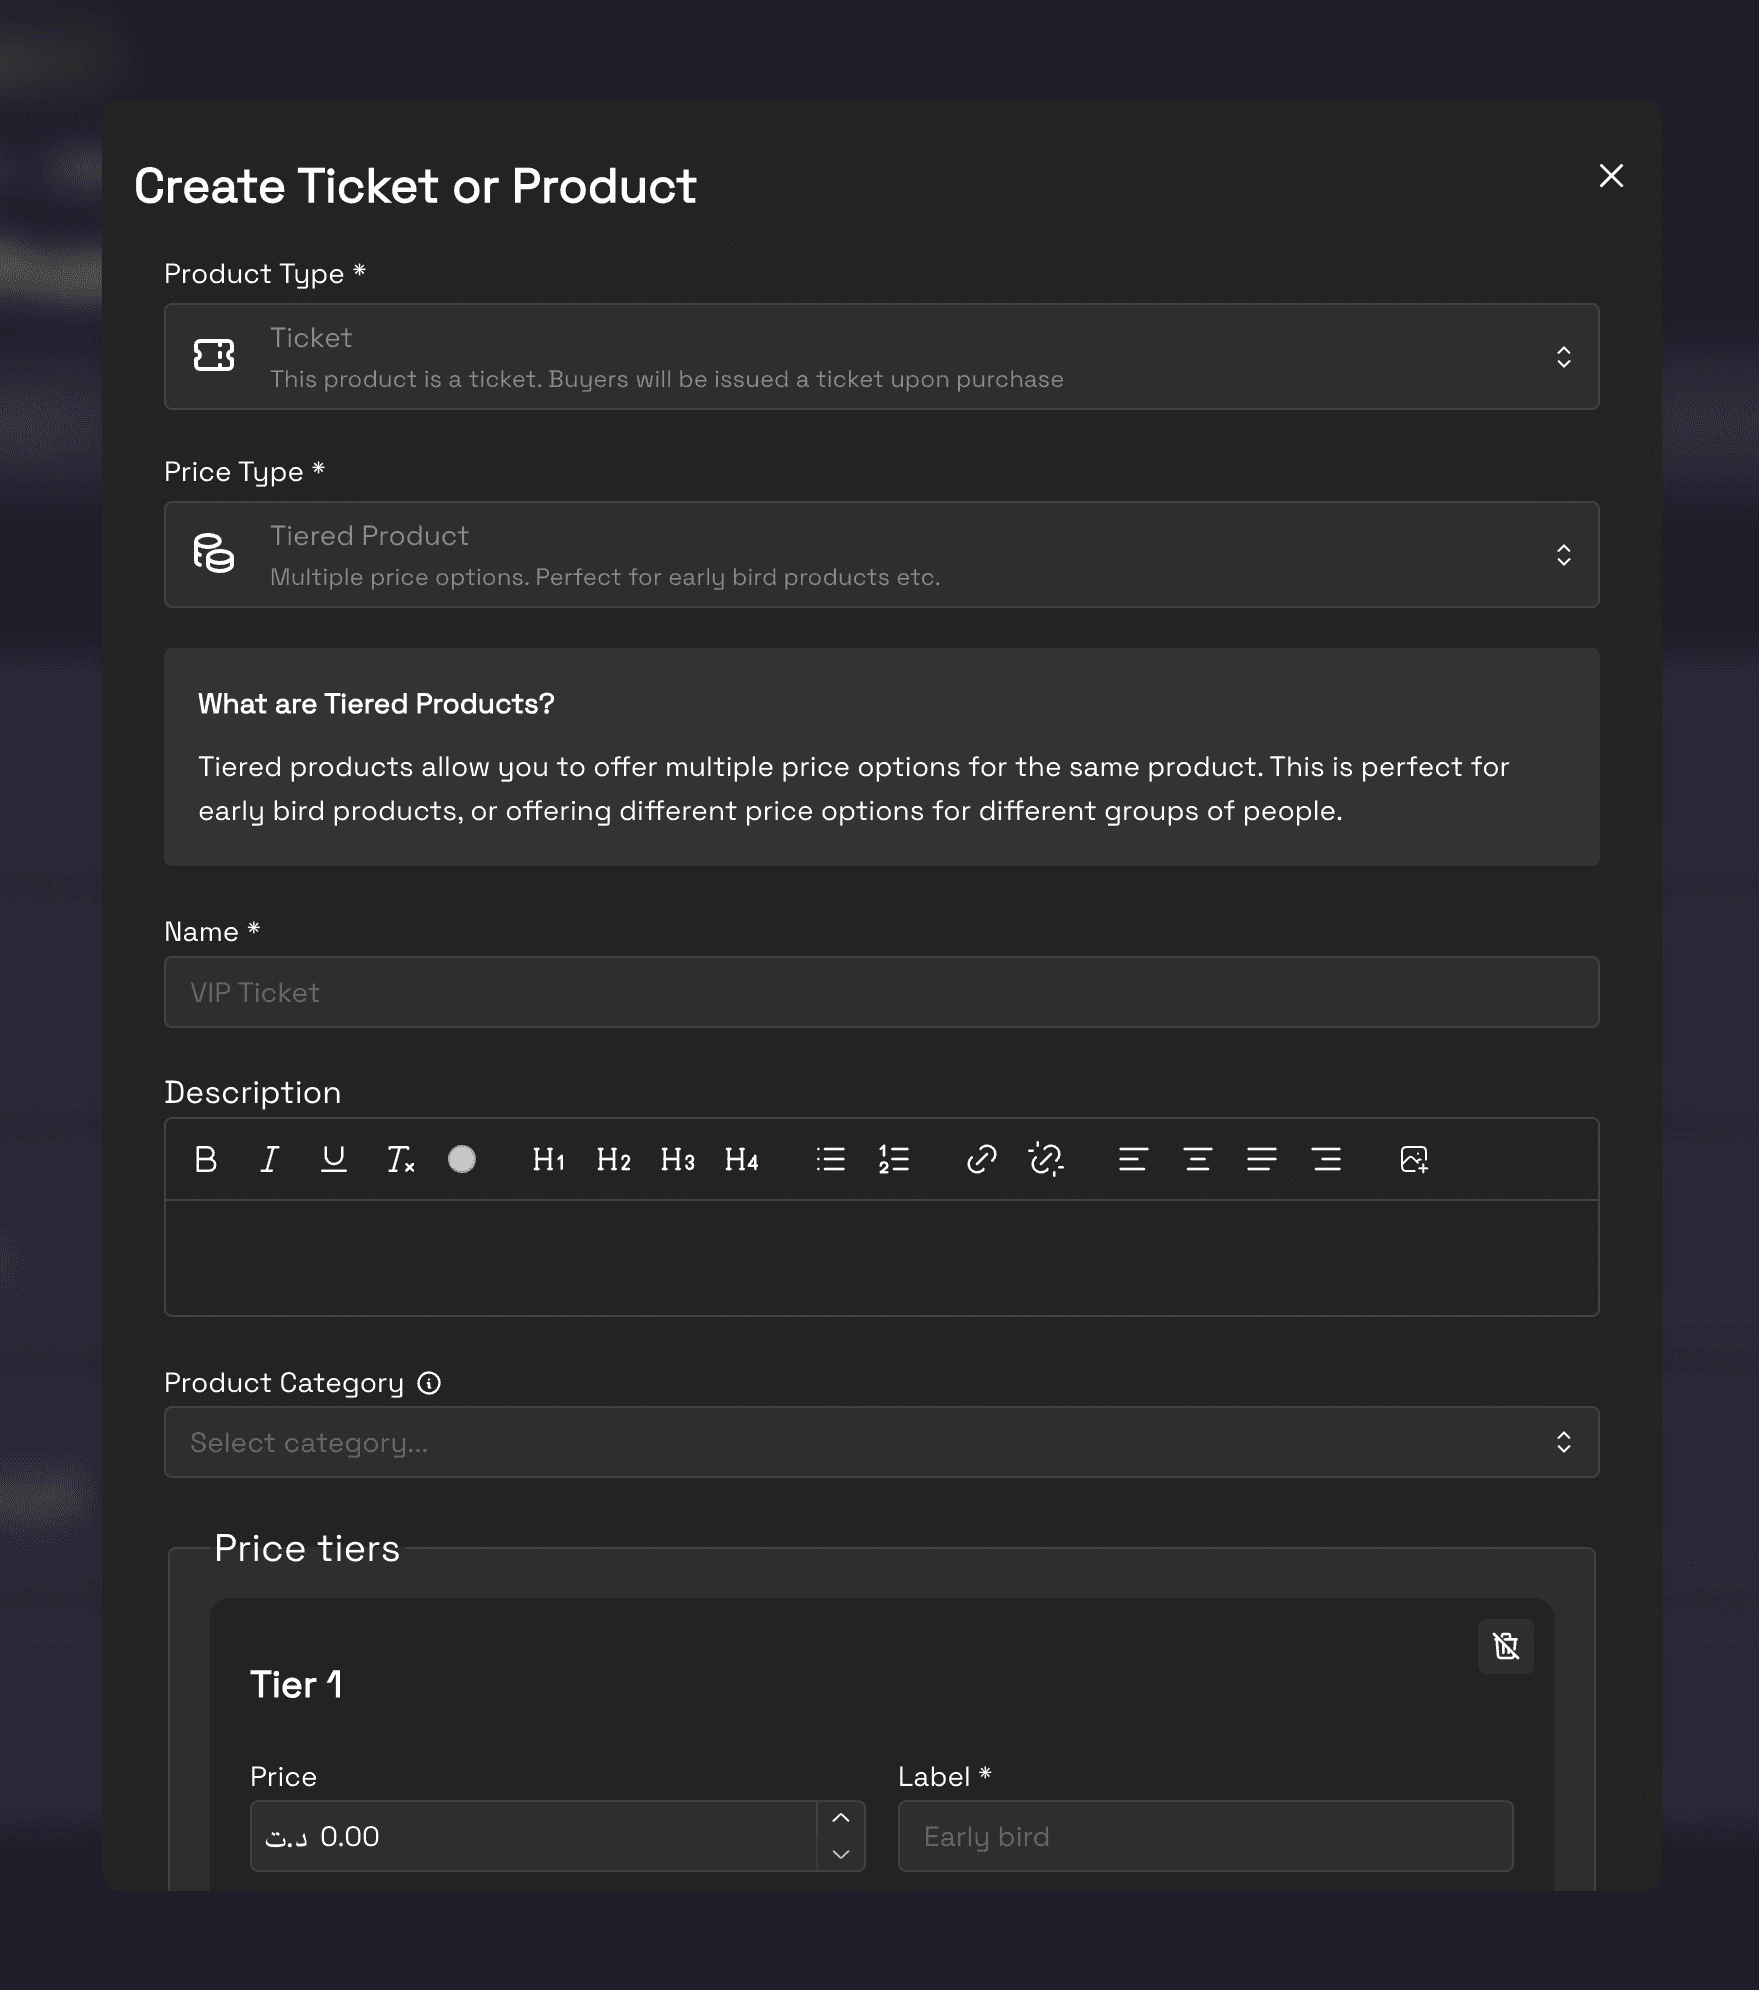
Open the "Product Type" dropdown menu.

Access the Product Type selection menu
3. Select product type
Choose between "Ticket" or "General" item types.
Tickets issue entry passes, while General items are for merchandise or donations
Setting Up Pricing
4. Choose pricing structure
Access the pricing type dropdown.

Select your preferred pricing structure
5. Select pricing type
Choose from four options: Paid, Free, Donation, or Tiered.
Tiered pricing is perfect for early bird discounts and special rates
Pricing Types ExplainedPaid: Fixed price ticketsFree: No-cost ticketsDonation: Let attendees choose their priceTiered: Multiple price levels (e.g., Early Bird, Regular, VIP)
Creating Tiered Pricing
6. Name your product
Give your product a clear, descriptive name.
Enter a name that clearly describes your ticket or product
7. Set up tiers
Begin creating your pricing tiers.
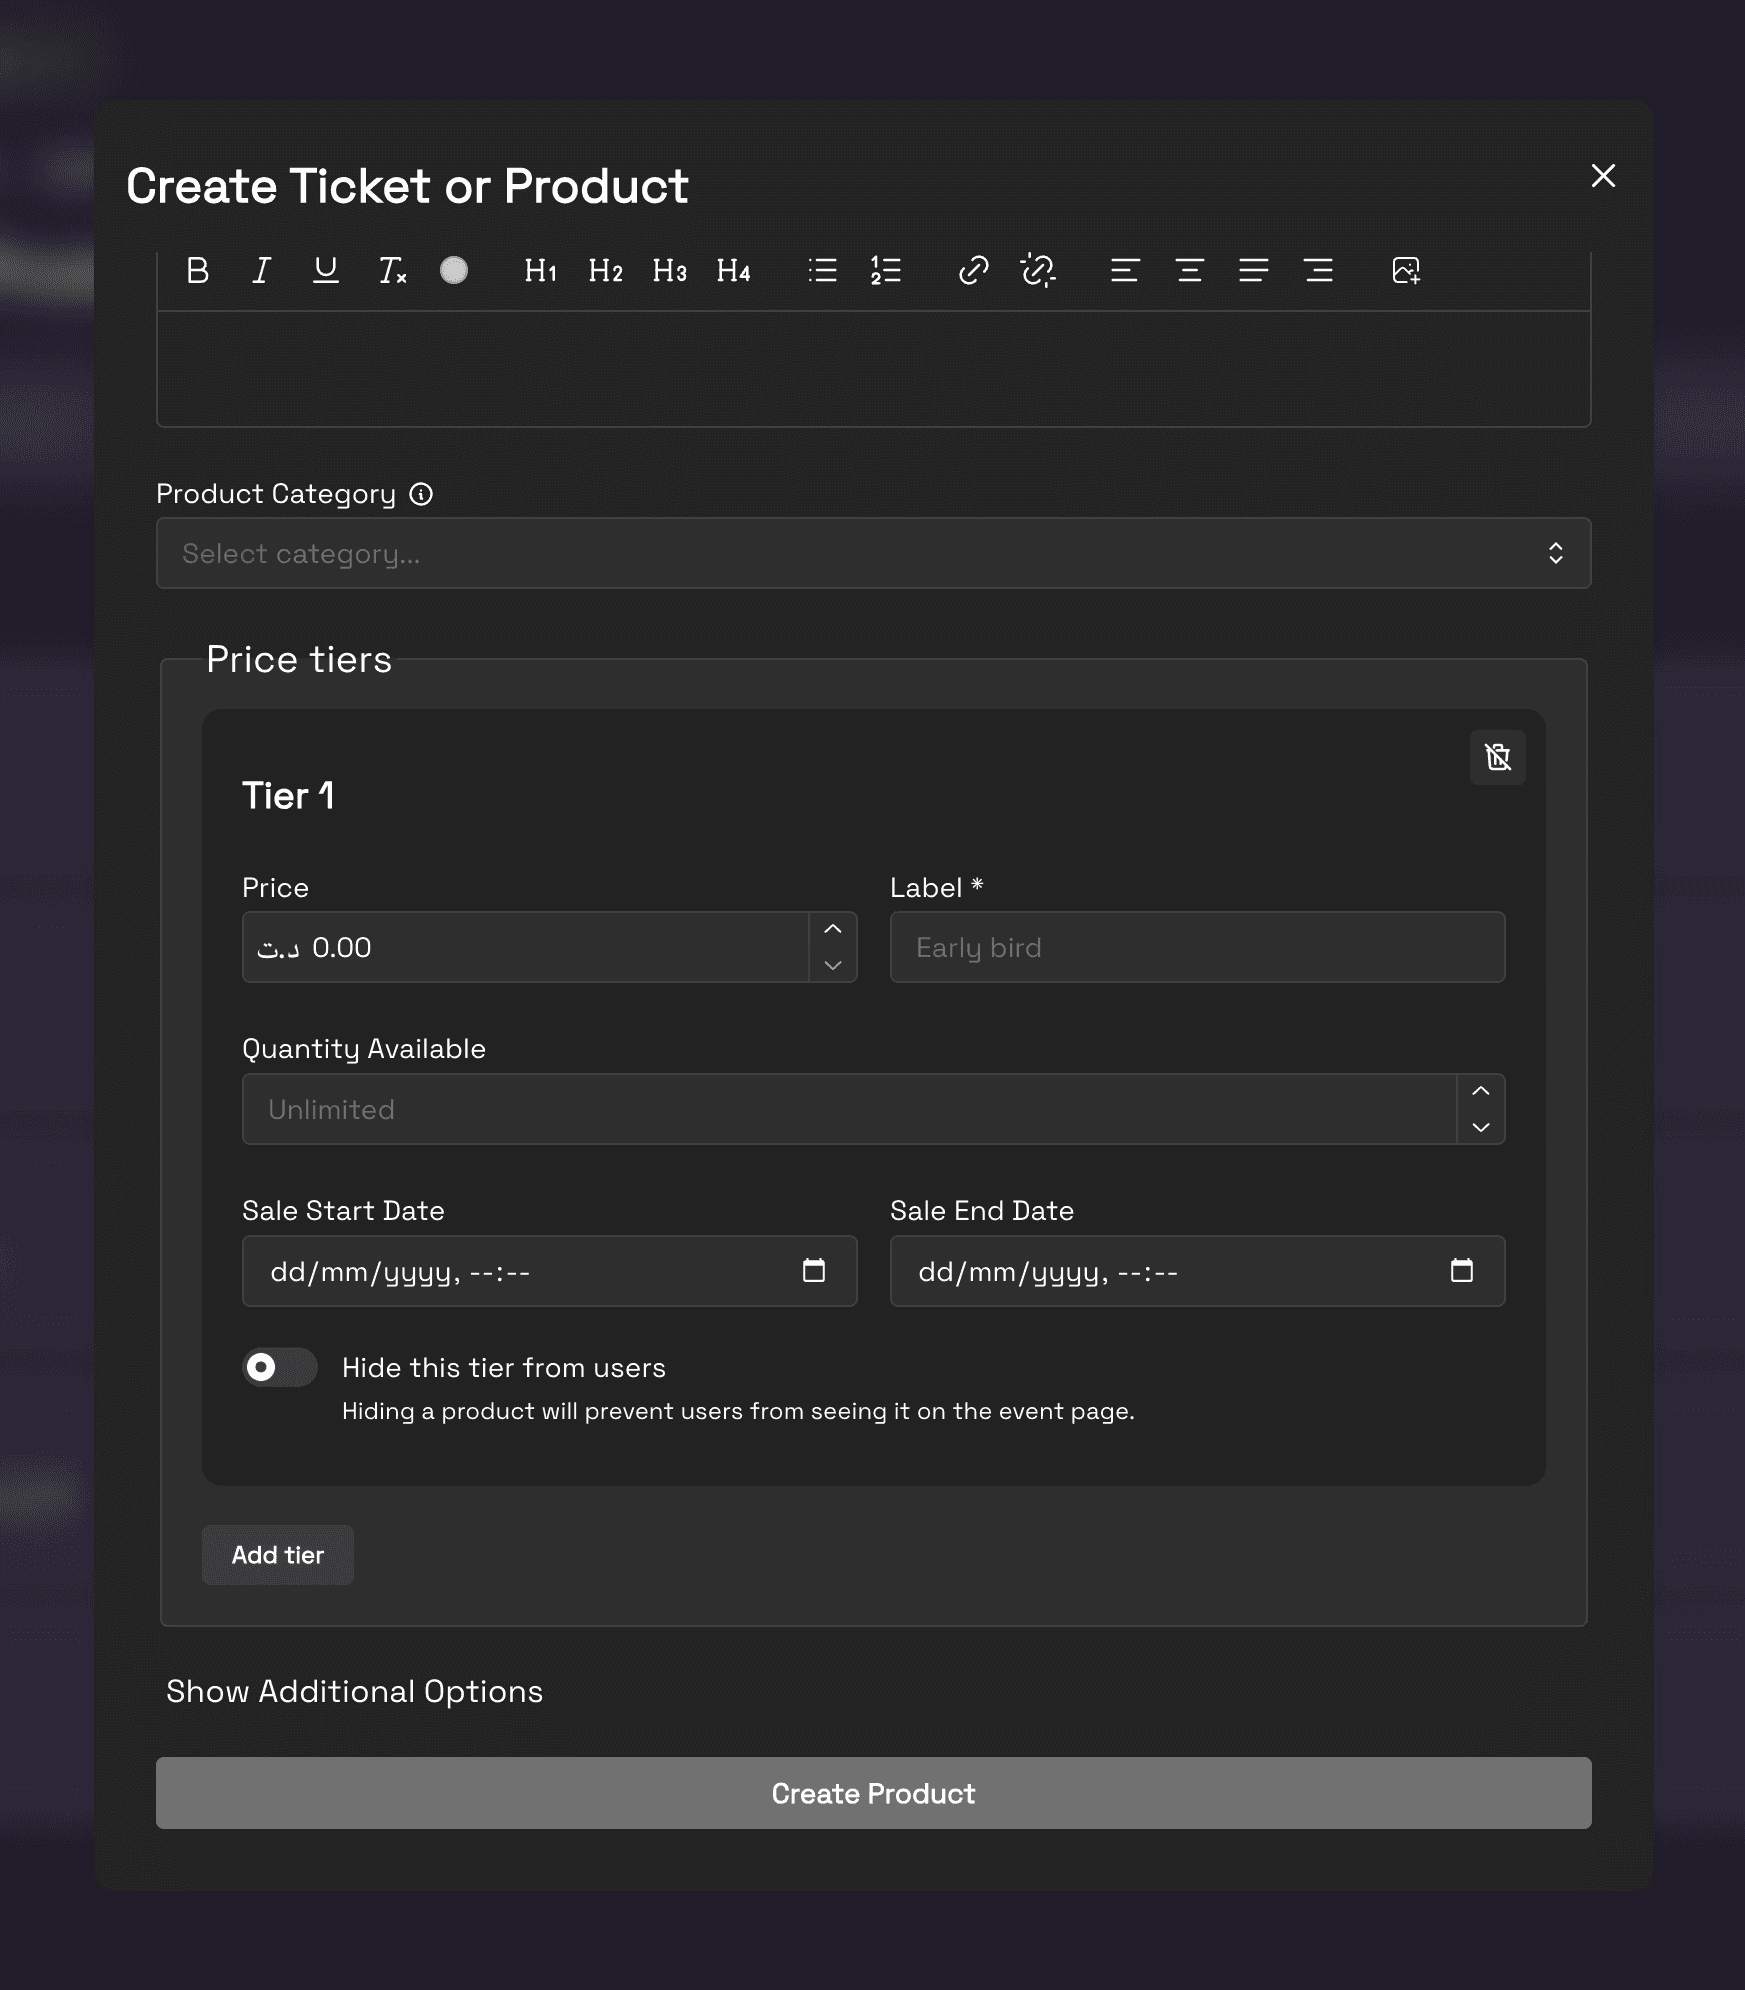
Create multiple price tiers for your product
8. Name first tier
Start with your first tier, like "Early Bird".
Name your first pricing tier
9. Add more tiers
Click "Add tier" to create additional pricing levels.
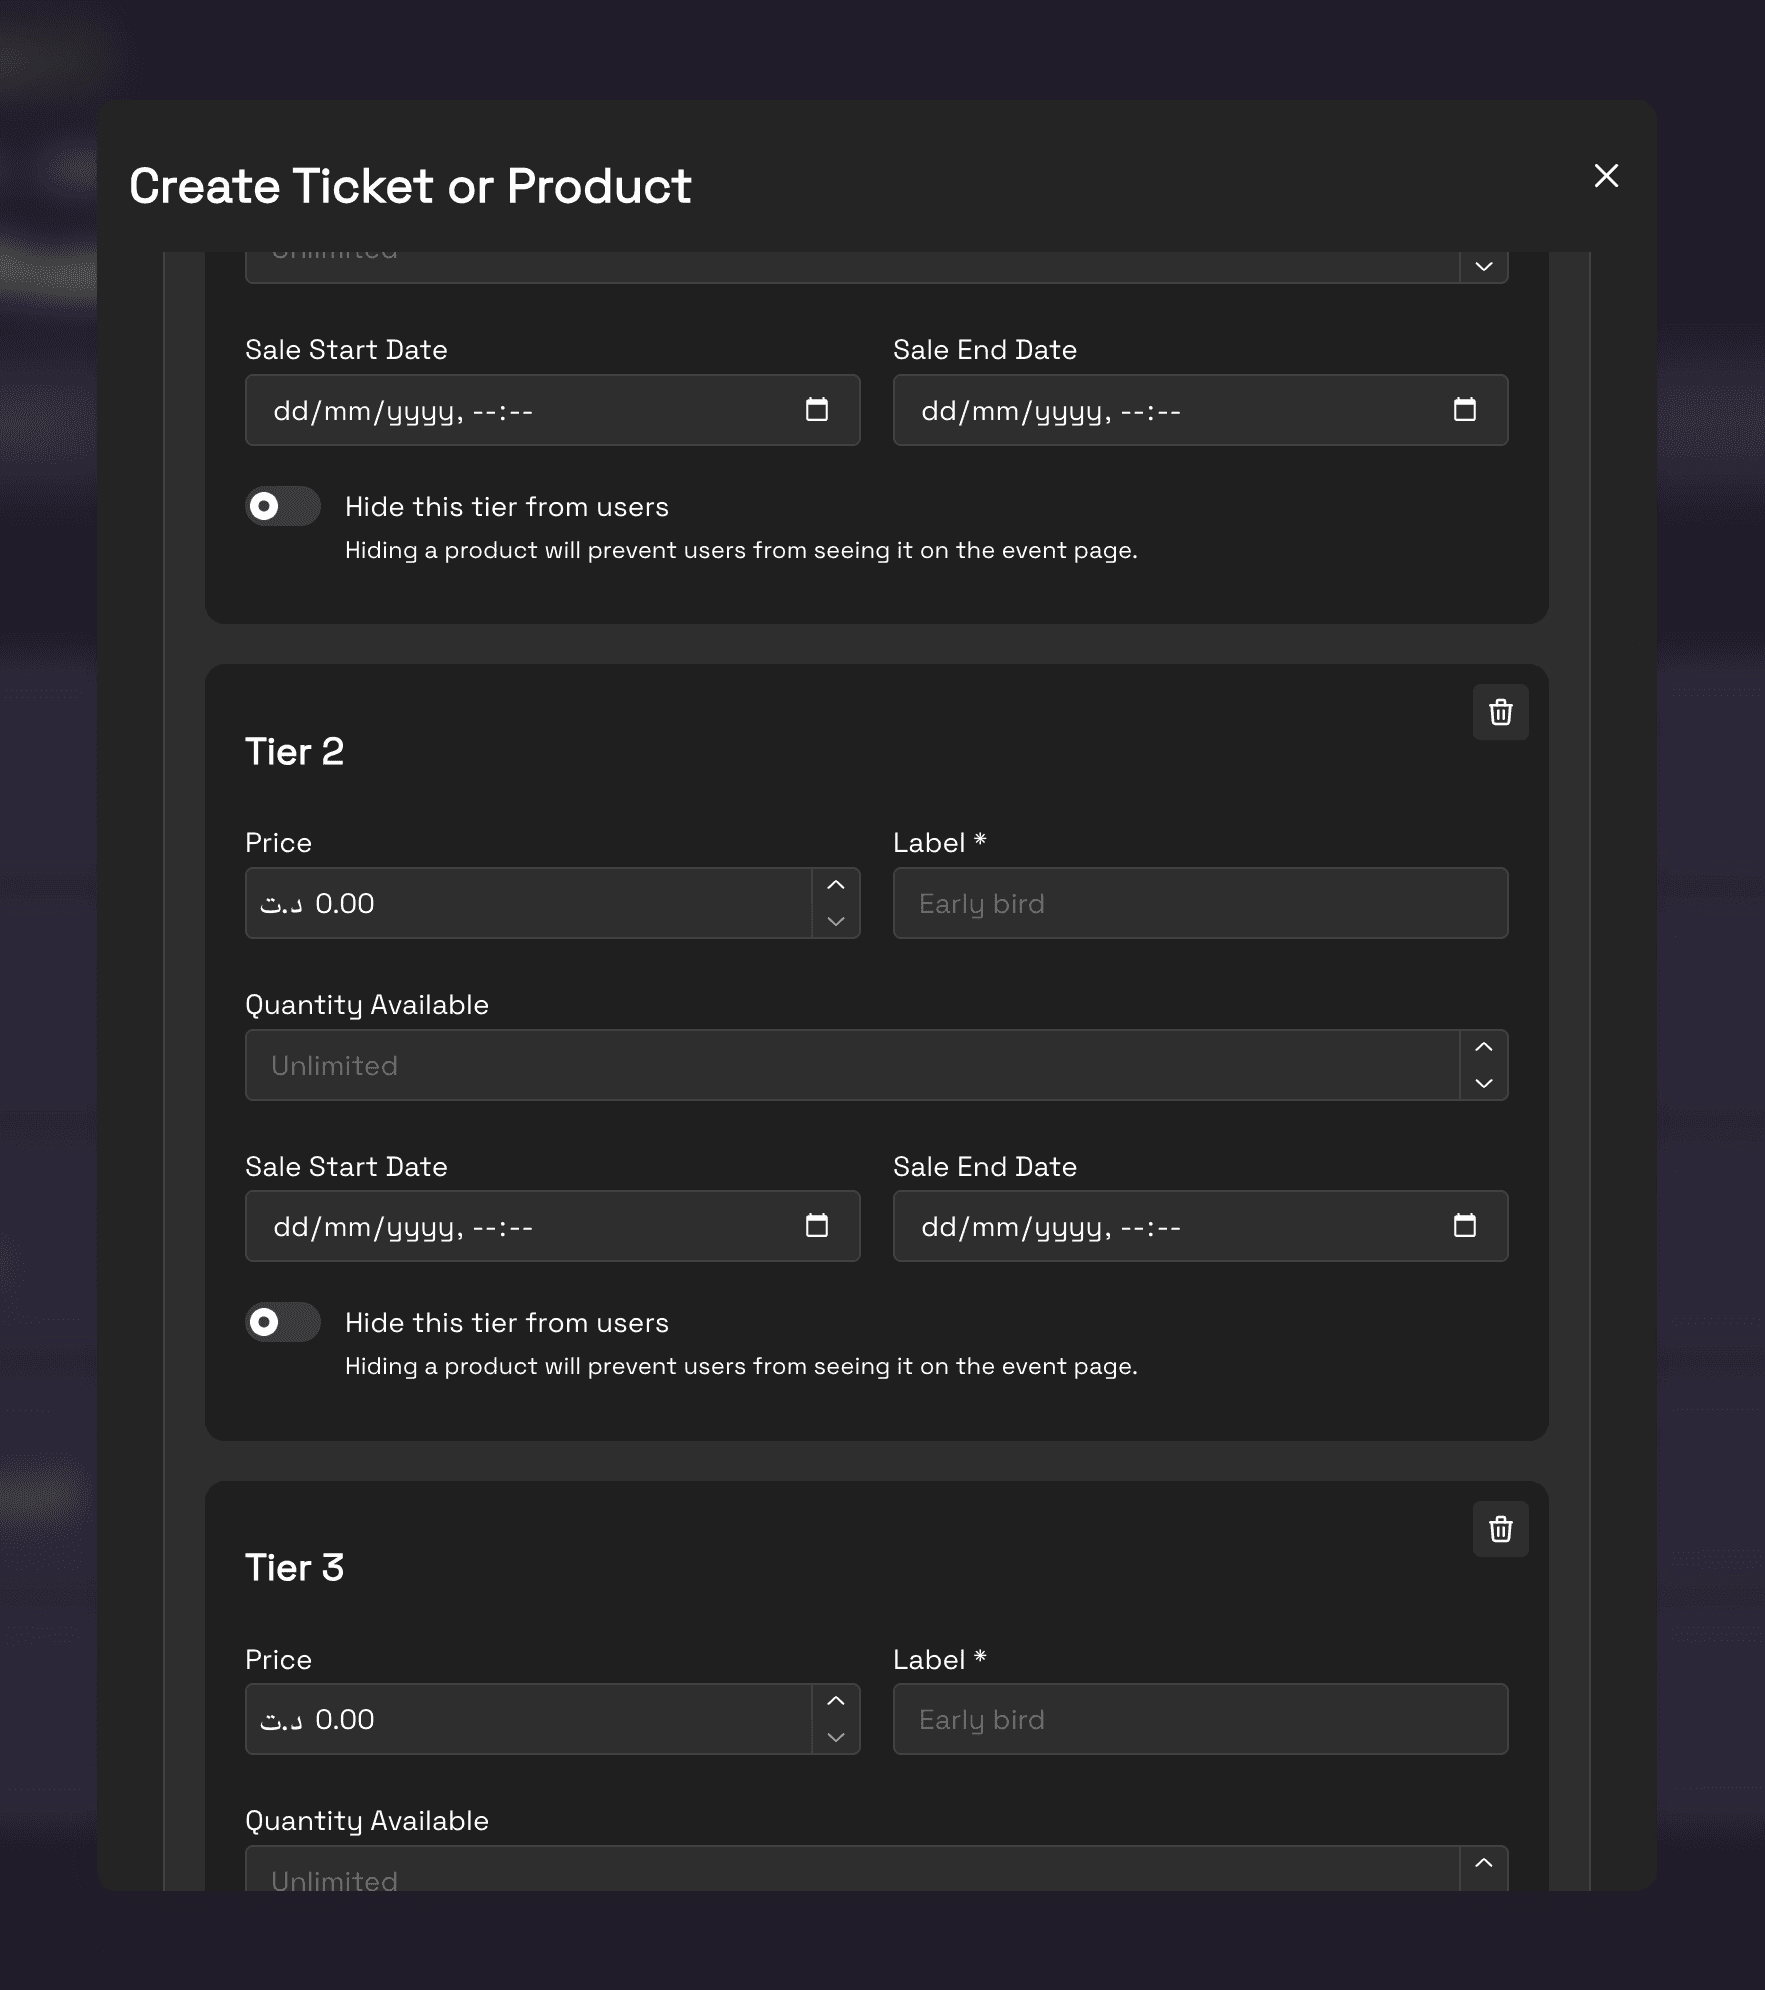
Add as many tiers as needed
10. Complete tier setup
Add all necessary pricing tiers.
Create a complete pricing structure
Advanced Options
11. Access additional settings
Click "Show Additional Options" for more features.

Access advanced product settings
12. Configure advanced settings
Set taxes, fees, and purchase limits.
Configure taxes, fees, and purchase restrictions
13. Finalize product
Click "Create Product" to complete setup.
Save your product configuration
14. Make future changes
Use the dropdown menu to edit your product later.
Access product settings anytime through the dropdown menu
Pricing Strategy TipsUse early bird tiers to encourage early registrationCreate VIP tiers with special perksSet appropriate purchase limits for exclusive tiersConsider using donation-based pricing for fundraising eventsAdd fees and taxes separately for transparency
Next Steps
After creating your products:
Preview how they appear on your event page
Set up promotional codes for special discounts
Configure inventory limits if needed
Test the purchase process
Getting Started
1. Begin product creation
Click "Add Product to Category" from your event products page.
Start by clicking Add Product to Category
2. Choose product category
Open the "Product Type" dropdown menu.
Access the Product Type selection menu
3. Select product type
Choose between "Ticket" or "General" item types.
Tickets issue entry passes, while General items are for merchandise or donations
Setting Up Pricing
4. Choose pricing structure
Access the pricing type dropdown.
Select your preferred pricing structure
5. Select pricing type
Choose from four options: Paid, Free, Donation, or Tiered.
Tiered pricing is perfect for early bird discounts and special rates
Pricing Types ExplainedPaid: Fixed price ticketsFree: No-cost ticketsDonation: Let attendees choose their priceTiered: Multiple price levels (e.g., Early Bird, Regular, VIP)
Creating Tiered Pricing
6. Name your product
Give your product a clear, descriptive name.
Enter a name that clearly describes your ticket or product
7. Set up tiers
Begin creating your pricing tiers.
Create multiple price tiers for your product
8. Name first tier
Start with your first tier, like "Early Bird".
Name your first pricing tier
9. Add more tiers
Click "Add tier" to create additional pricing levels.
Add as many tiers as needed
10. Complete tier setup
Add all necessary pricing tiers.
Create a complete pricing structure
Advanced Options
11. Access additional settings
Click "Show Additional Options" for more features.
Access advanced product settings
12. Configure advanced settings
Set taxes, fees, and purchase limits.
Configure taxes, fees, and purchase restrictions
13. Finalize product
Click "Create Product" to complete setup.
Save your product configuration
14. Make future changes
Use the dropdown menu to edit your product later.
Access product settings anytime through the dropdown menu
Pricing Strategy TipsUse early bird tiers to encourage early registrationCreate VIP tiers with special perksSet appropriate purchase limits for exclusive tiersConsider using donation-based pricing for fundraising eventsAdd fees and taxes separately for transparency
Next Steps
After creating your products:
Preview how they appear on your event page
Set up promotional codes for special discounts
Configure inventory limits if needed
Test the purchase process
Other articles you might like
Learn how to increase your productivity with calendars